Jan 12 2010

unromantic update

Tag: boat work,preparationmattholmes @ 9:33 am

I don’t have the energy or passion for a well-written update this time, but I know there are at least a few people out there who are curious about us.  Full disclosure: I just finished reading an idiotic book and drinking a cup of jonny walker following a full 10 hours of stupid fiberglassing so my mood is shitty.

-We moved out of our studio apartment over the holidays, while four friends visited and slept in our living room.  Our guests were perfectly fine with the furniture and bed disappearing from underneath them (no kidding).  Jon and Rishona came out to see the boat, work a bit, and meet us, because they are planning on joining us in the south pacific this summer, if all goes according to plan.  Gary and Anna came out to california because they are awesome.

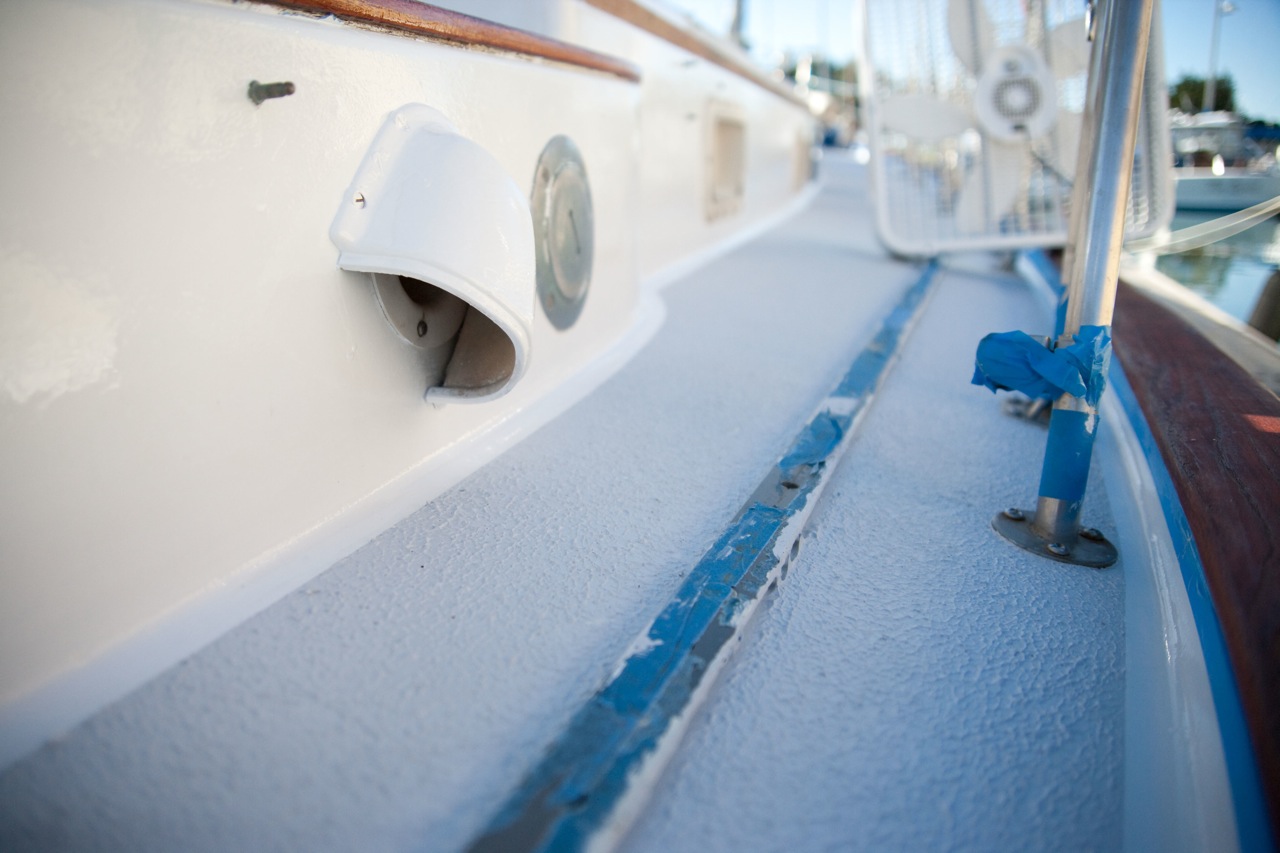
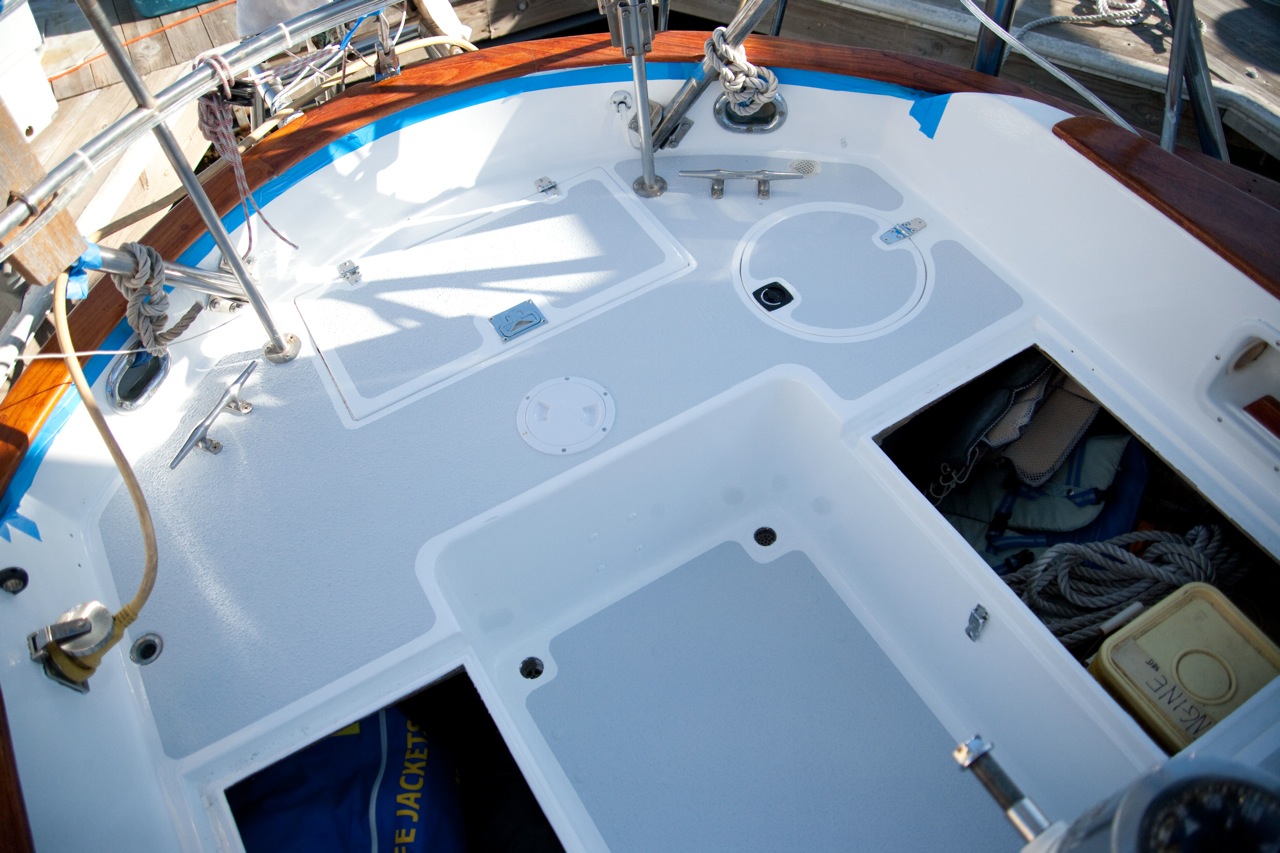
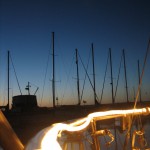
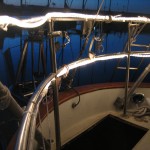
-We moved onto the boat, though half of the boat is intermittently unlivable (and I mean 1/4″ fiberglass dust snow all over everything toxic air to breathe unlivable).  Our belongings get shuttled around on an hourly basis like all those tiles in that hand held game where there is a grid of jumbled number tiles that you have to move around to put them in order but there’s only one blank space to use so you have to move all of the other tiles that you don’t want out of the way to move the number you want into place and it turns out that that process is difficult enough that they invented a game around it.  Fully 10% of my waking hours are occupied by moving the same stuff back and forth and around and around.

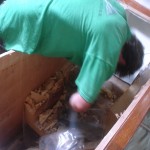
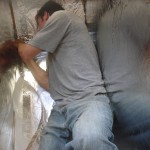
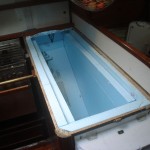
-As reported in the previous post, the knees of the boat came unbonded from the hull, a situation which justifies me giving a big middle finger to the fucking assholes who built this supposedly indestructible boat.  The bomber reputation of the Valiant 40 is bullshit.  Glassing the knees to the hull is second in importance only to actually having a hull in the first place, and the peons that glassed my knees to my hull did a shitty ass job of it and now I’m busting my ass to fix something that should have been included in the first 2,000 dollars of the much higher price of this boat.

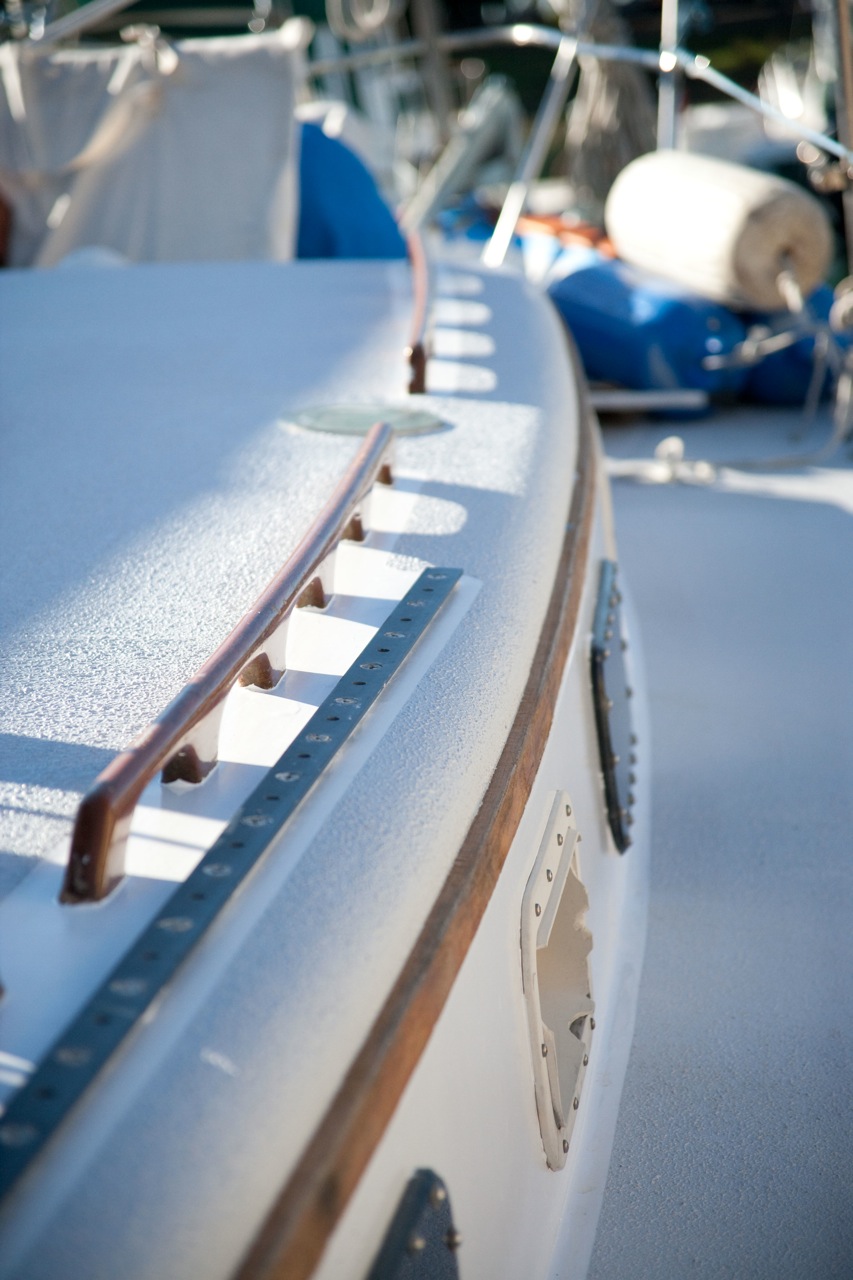
-We were planning on leaving January 14th, and our good friends Pete and Ray bought plane tickets to fly out and join us (the only reason for the very specific jan 14th date) and help us sail down the coast for a month.   Since it’s down to just Karen and I and a busted boat, I am incredibly grateful to have their experienced assistance to do the first (wet cold worst) month.  Well, now that the boat is sucking a big fat one, I mailed Pete one of the chainplates that needs to be replaced and he’s making a new set for me.  How’s that for a friend, right?  I screw up their plans and as an apology he gets a hunk of metal in the mail to duplicate 8 times over for me and they don’t even give me a hard time for it?  Damn good friends, that’s for sure.  (I even called him this morning and greeted him with a “so I have this windlass, and the threads on the shaft are crossed . . .”)   I owe them big.   So now Pete and Ray changed their flights and we’re planning on leaving February 7th now.  All I have to do is rebuild the boat before then, no biggie.

-Karen is being much more productively outspoken about our current situation in her booming blog, so please visit her site to get cheered up after reading this post.

I’m actually not all that bummed out as I sound, I’m just super exhausted and it just started raining and all I can think of is how many places it is undoubtedly leaking into the boat this very moment.  A-we need to catch a break and B-we need to get the hell of out of this place, prontospeed.


Nov 26 2009

Drastic Measures

Tag: boat workmattholmes @ 2:02 am

I’m still working on the boat, don’t worry.

I’ve been trying to finish painting the deck, for months now actually, and I am discovering that November 25 in San Francisco is a terrible time to try to dry anything.

Here’s a picture I took today:
_G4Z0583


Notice that it appears our boat is leaving the slip. Don’t be fooled: I pushed the boat half out of the slip in a desperate attempt to shine a little bit more sunlight on the deck. Unfortunately, the boat’s little trip half out of the slip and back in was the farthest it has travelled in months.

Here’s another one for you:
_G4Z0570

In this one, notice the box fan in the upper right background. I ziptied this to the stanchion and have been running it for the past 36 hours.

I don’t have a picture of me holding up one of my photography reflectors trying to dry the side deck–I lasted about 15 seconds before I realized the futility of that one.

Here are some pictures of the progress:

Also, I borrowed a heavy-duty sewing machine from Greg down the dock and I’ve been sewing our lee cloths with really crooked lines of stitches:


Nov 13 2009

Night Activity

Tag: boat work,marina life,preparationmattholmes @ 6:02 am

A brief glimpse into what working on the boat has been like for us the past few weeks:


Aug 05 2009

Mast Steps

Tag: boat work,victoriesmattholmes @ 7:55 pm

A while back I designed a mast step for us, we had a sailor/machinist friend advise us and then make them up for us, and Jonny installed them.  We love them, and it turns out that others do, too.  We had enough requests that we decided to start making and selling them on a small scale, and see if it goes anywhere.

We’re calling it “Climb the Mast“.

They are sweet steps, as far as mast steps go.  They’re small, so lines don’t catch on them, they’re easy to install, and they’re cheap.  The only reason we made our own is because we weren’t happy with any of the other options available–the others are either to big (the fixed stirrup-style), too unwieldy (the folding ones), or too expensive (all of them).

They work so well that we’ve been running up the mast regularly while we are out in the bay under full sail.  It makes for good group pictures during our social sails, to do them from the top of the mast looking down with the sails flying and our wake spreading out behind us.

Anyway, we hope that maybe this little side project could help fund the trip, so if you know of anyone looking to put in mast steps, point them to the website Jonny set up: www.climbthemast.com.  Also, check out the original maintenance blog post I did when we first put them in, and also Jonny’s post about drilling the holes in the mast.

SANY0702

[geo_mashup_map][geo_mashup_show_on_map_link]


Jul 17 2009

A glorious holiday

Tag: boat work,musingsjonny5waldman @ 8:37 pm

In honor of Independence Day, and brave adventurers like Thomas Jefferson and John Adams, I dug up an American flag from the wet locker and hung the stars and bars from backstay. I hate to get all jingoistic, but there’s something fantastic about a boat, a flag, and the water, something almost timeless, something that people 233 years ago and long before that must also have recognized. I’d call the combination a triumvirate of awesomeness, were not that label already taken.

The flag, five feet off the deck, bestowed upon Syzygy some glory. That afternoon, the wind picked up from the west, and the flag began flapping loudly, wrapping around itself, fluttering and flicking about. I was working on the lazarette — aka stern locker — and kept ducking to keep from getting smacked in the face by the flag. There’s a metaphor for a boat: sacrificing practicality for beauty, functionality for symbolism. These are sacrifices worth making, sometimes.

So I kept my head low, determined to crank some productivity out of the holiday. Unfortunately, I kept my nose so close to the deck that the wisdom in the air almost blew by unnoticed. Almost, but not quite.

Jim, from Kanga, stopped by, and we chatted about ideal gasket-making techniques, the better to keep the ocean out of the new stern locker. “Water’s gonna come in the hatch,” Jim said. “You can’t force it, just direct it.” He paused. “Actually, you can’t direct it, just coax it.” He recognized the poetry he’d spoken, and laughed. It applied to so many hurdles before us. I told him I wouldn’t forget it.

An hour later, two of Jim’s friends stopped by. I was upside down and backwards in the new propane locker, fiberglassing away, and when they — a couple — yelled hello, I waved with my foot before extracting myself. They laughed because they’d spent three years fixing up (“nerding out” they called it) a 1988 Passport 42 before sailing it to New Zealand, and recognized what I was up to. Their work had paid off; their voyage wasn’t compromised by mechanical failures or catastrophes, and that bolstered my spirits. They recalled having to explain to friends that, contrary to popular opinion, sailing wasn’t all fancy drinks and white shoes; that nautical-themed pashmina afghans never entered into the equation. “You’ve probably heard this before,” he said, “but remember: It’s a lifestyle, not a vacation.” Here’s to the eloquence therei

Two days later, still nose-down, Matt and I stopped by Svendsen’s, to empty out our bank accounts and acquire some information and goods in the process. I’d been having a bitch of a time polishing the metal of our new radar arch, so I stopped by Svendsen’s metal shop, and asked Chris for advice. He led me around the workshop, revealing industrial-grade tools I could only fantasize about. No, I could not borrow them, and no, I could not afford to pay $80/hour to have them polish the metal for me. Chris told me where to pick up jeweler’s rouge (aka grinding paste) and then, all Yoda-like, sans-pronouns, offered the best advice I’ve heard all year: “When faced with daunting task, lower expectations.” I may take him up on that.


Jun 29 2009

Sewing. Exciting!

Tag: boat workJonathon Haradon @ 2:16 pm

The sail-making kit arrived from Sailrite two months ago.  I immediately opened the box and had, on a mini-scale, the same feeling upon seeing our boat for the first time.  “What the hell am I getting myself into?”  I slowly plodded through the instructions and all of the components.  Like poking around the boat for the first time, this induced more feelings of dread.

34 yards each of light blue and dark blue ripstop Nylon Sailcloth
79 feet of leech line
81 feet of 5-ply Waxed Bobbin Twine (I still don’t know what this is for)
1 square foot of 2-3 oz Pearl Gray Cowhide Leather
240 yards of Seamstick Basting Tape (both 1/2” and 1/4”)
a variety of other stuff

One last item caught my eye.  2400 yards of 1 oz V-46 White Polyester UV Thread.  Over 1.36 miles of thread.  It would take me 9 minutes to sprint a distance the length of the thread included in the Sailrite kit.  It would take our boat over 7 minutes, at top speed in heavy winds to cover the distance.  I tried not to think about how much sewing this implied.

I did know the first step, though, of this project:  securing a location to do the sewing.  My condo would not do.  The total square footage of my condo is 1126  feet, not including the balcony.  The largest room is a mere 220 square feet.  The square footage of our sail: 706.37 square feet.  My condo would not do.

I had been to another sail-making shop though, when we needed a patch put on our jib.  They had an enormous wood floor that immediately made me harken back to my high school basketball days.  The perfect location was so obvious.  I even work at a school… easy access!  A week later I sheepishly asked my principal at my school if I could use the gymnasium after school the next week.

“For what?” she inquired.

“I’m sewing a sail for our sailboat.”

“Wow.  Do you know how to make a sail?”

“No.”

“Do you know how to sew?”

“No.”

She laughed and wished me luck.

A week later I carted into the gym a box of supplies, including my sewing machine, some scissors, pens, black clips and scotch tape that I borrowed from school, and the Sailrite kit.

I then left and fetched a 48-inch wide dust mop.  Because I knew the floor was gross.  No way was I laying our brand new thousand dollar sail down on that floor.

Sail laid out on gym floor

Sail laid out on gym floor

I pulled out the scraps they include for patches and making sure the settings on your sewing machine are correct; they would be my practice test runs and only the fourth time I had ever operated the sewing machine.  I hemmed and hawed, but finally set up a work station in the middle of the gym floor and went at it.

And it was surprisingly easy!

Step 1: Take a roll of Seamstick basting tape and methodically roll it on to the edge of one of the sail panels.  
Note: Be careful to keep the sail taught but not stretched while applying.  There can be no bunching or buckling of the sail or of the basting tape.

Step 2: Line up two panels.  Remove backing to basting tape.
Note: a little at a time is best.

Step 3:  Apply one sail panel on top of another, lining it up on the marks drawn on the sail by Sailrite.

Note: This time both sails must be taught, but not stretched, as they are joined together.  
This results in awkward positioning wherein one knee is on the union of the sail panels where they have already been basted so as to provide the main anchor point for proper sail cloth tensioning for the next basting. The other leg, so as not to be on the sail cloth, thus providing another anchor point on the sail, resulting in improper tensioning, and consequently buckling or bunching of the sail cloth, must wrap on top of and behind the other leg.  Now while balanced here, one hand pulls taught one sail, the other hand pulls taught and applies the other sail to the basting tape.  Yoga helps.  The position I would get into, incidentally, looks a little like a kneeling eagle pose.

Sail with basting tape applied.


Sail panel with basting tape applied.

P5060244

Basting the panels together.

Panels basted together.

Panels basted together.


Step 4:  You should only do the joining of sail panels in small increments so as to ensure a proper sail union.  “Basting is a  critical step in sail-making.”  So says Sailrite.  Therefore, repeat step 3, 8 inches at a time, and just to join two sail panels you might be at this for 40 feet.

Step 5:  Roll up both panels from each end so that only the seam is showing.  
Note: Rolling the 4 foot wide panels at the head (top) of the sail by yourself is easy.  Rolling 40 foot wide panels at the foot (bottom) of the sail by yourself is not.

Panels lined up to sewing machine.

Panels lined up to sewing machine.


Step 6:  Finally some sewing!  Drag entire ensemblage over to sewing station and begin to sew.  
Note: A 45 degree zigzag stitch is proper, 3 mm wide.  No backing of the thread is required at the edges because luff tape will cover and anchor the strands of thread.  Be sure to sew as close to the edge of the seam as possible.
picture

Step 7:  Repeat Step 6.  Two rows of zigzag stitching are required at each seam.
Note: Three rows if using a straight stitch.
Note: On 40 foot sail panel seams, two rows of zigzag stitching will require you to change the bobbin on a standard consumer sewing machine a minimum of three times.  This will be annoying.
Note: On 40 foot sail panel seams, two rows of zigzag stitching will take beginning sewers 2 hours.
Note:  Your back will hurt from leaning over.
Note:  Your eyes will get fuzzy from staring at one spot for hours.
Note:  Your left leg will cramp from being awkwardly positioned to the side while controlling the speed with your foot on the footpad.
Note:  Your right knee will hurt from being on the ground for hours.  Even if wearing a knee pad.

There you have it.  Sewing the sail panels together in 7 easy steps.  All it takes is time.  Lots of time.  Next comes the reinforcement patches on the corners and the edges.  Both do not seem as straight forward as stitching in a straight line for 40 feet.


Jun 16 2009

Refrigeration

Tag: boat work,energy efficiency,victoriesmattholmes @ 6:47 pm


I built this:

compressorskid2compressorskid4


Out of this:

compressor1

I read Nigel Calder’s “Refrigeration for Pleasureboats” three times, I read Richard Kollman’s forum on marine refrigeration, and I spoke with Marcus a few times (a fellow cruiser-friend in the marina).  Marcus is lending me his top-quality, indispensable refrigeration tools (much thanks to Marcus!), and also turned me on to RParts, where I ordered all my stuff.  I learned how to “sweat” copper tubing (i.e. silver soldering copper), how to form flare fittings, how to use a refrigeration gauge set, the detailed principles behind refrigeration, and I built my own refrigeration system.  I’m pretty proud of this 1.5′ x 1.5′ x 1′ cube of refrigeration goodness–it’s hard to believe that a month ago I didn’t understand how this thing worked, and now I’ve built my own out of parts.  It’s not making anything cold yet, but I pressure tested it yesterday and to my immense satisfaction and relief I have no leaks!  (that’s huge–to find and fix a leak would have been a nightmare)

Refrigeration is a lot more interesting once you understand how it works.  You don’t want to hear the details, but I have admin access on this blog so I’m going to tell you all about it.

—————————————————————————————————————————

A refrigerator works by moving heat from one place to another.  It does not “create” cold.  Heat is removed from the icebox and deposited at the “hotbox” (that’s my own term, it will be helpful for the discussion).  On our boat, the hotbox happens to be the storage space under the quarterberth; for your fridge at home, the hotbox is just the space behind the fridge.

On each side of the circuit there is a heat exchanger.  The heat exchanger transfers heat from the air to the refrigerant in the icebox, and from the refrigerant back to the air in the hotbox.  The heat exchanger in the icebox is called the evaporator; the heat exchanger in the hotbox is called the condenser.

The refrigerant is the medium that moves the heat around the circuit.  If the refrigerant was simply pushed around in a circle, it would not be inclined to transfer heat out of the cool icebox into the warm hotbox–that would be trying to push the heat uphill, so to speak.  The key is to pressurize the refrigerant, using a compressor.  When the refrigerant is compressed, it warms up; when it de-compresses (expands) it gets cold.  The refrigerant comes out of the icebox medium-warm.  The compressor pressurizes the refrigerant, which heats it up.  Then the pressurized refrigerant passes through the condenser–which looks like a mini car radiator–and as the refrigerant passes through the condenser its heat is transferred to the air (just like your car radiator, in fact).  The refrigerant returns to the icebox at a mediumish temperature, but this time it’s pressurized.  At the icebox, the refrigerant is allowed to expand–which causes it to get cold.  The cold refrigerant sucks up heat as it passes through the evaporator.  Then the process is repeated.  Good diagram.

There’s one more principle at work: phase changes.  If you just pumped a liquid around in circles, from the evaporator to the condenser to the evaporator to the condenser, etc, then you might be able to remove a small amount of heat from the icebox and dump it at the condenser.  However, you can’t suck up much heat just by warming up a liquid and then cooling it off.  The real way to suck up heat and drop it off elsewhere is to use a PHASE CHANGE to your advantage.  The phase change is the key to the whole process.

Consider heating a quart of water in a pot on the stove.  It takes 320 BTU of energy to heat that water from 33 degrees F to 211 degrees–320 BTU to change the temperature of the water by 178 degrees.  Then, to heat that water only 2 more degrees, from just 211 degrees to 213 degrees, it takes 1934 BTU!  Because at 212 degrees, the H2O changes from water to steam; this is the phase change.  During the entire process of converting water to steam, you keep dumping in large quantities of energy and the temperature stays the same–all the energy goes into the conversion from liquid to gas.  The message is that the energy required to do a phase change from water to steam is WAY GREATER than the energy required to change the temperature of the water itself.

In refrigeration, we store our heat as a phase change of the refrigerant in order to efficiently transfer it from the icebox to the hotbox.  We don’t use water though, because we want the phase change to take place around the 20 degrees F in our refrigerator (not very helpful to us for it to take place at 212 degrees).  We use refrigerant specially formulated to undergo the phase change near freezing (in our case, R134a).

We pump a liquid to the evaporator, and then let it expand into a gas; that expansion to a gas sucks huge amounts of heat out of the box.  Then back at the compressor we compress the gas, which heats it up (essentially exchanging “pressure energy” for heat).  Then we send it through the condenser, where the the hot gas dumps off all its heat and turns back into a liquid (condenses!) in the process.  Then we sent the liquid back to the evaporator, where it turns into a gas again . . . and so on.  The refrigerant goes to the icebox as a liquid, but it returns as a gas; the phase changes that happens in the icebox and the hotbox are the primary means of temporarily storing the heat in the refrigerant for transfer from one location to another.

Refrigeration is by far the single largest energy sink on a cruising sailboat.  In the average residential home, refrigeration is 5% of the energy bill–not an insignificant amount. One site says that the average fridge uses ~$8 of electricity per month, depending on how big, what kind, and where you live.  The efficiency of the refrigeration system depends very strongly on the refrigerant dumping off heat as it passes through the condenser.  Most systems use air-cooled condensers (I put in both air-cooled and water-cooled condensers–the air-cooled is the radiator-looking thing in the picture above; the water-cooled is the black circle of tubing on the top of the apparatus).  If the air-cooled condenser is located in a cool spot with good air-flow, this heat dump can happen very effectively; if the condenser is located in a hot spot with stagnant air, or even worse in the hot engine room, then the refrigeration cycle’s efficiency plummets.  Meaning that the fridge runs much longer, and consumes much more power.  Moral: the quickest improvement you can make to reduce your energy needs on a sailboat is to improve the air circulation around the refrigeration condenser.

You can do the same for your fridge at home: just pull the fridge away from the wall an extra inch, and you’ll greatly increase the air-circulation around the condenser, improving the efficiency.  Avoid shoving plastic or paper bags between the wall and the fridge for storage–that’s not helping out your fridge, or your electrical bill.  Even better, use a vacuum to clean off the condenser tubing on the back of the fridge–that gunk kills the condenser’s ability to dump heat.


May 17 2009

quick update

Tag: boat workmattholmes @ 5:41 pm

just to let you know what we’re up to . . . Jonny and I are taking the boat apart, starting too many huge projects all at once, and getting way in over our heads. Good times! We are simultaneously rebuilding the fridge, moving the propane locker to build a lazarette hatch, and rebuilding the entire radar arch/bimini/solar panel setup. A few pics:


« Previous PageNext Page »